
속성(attribute)에도 binding할 수 있다
HTML태그 속성(attribute)에도 binding을 할 수 있다.
이전 포스트에서 만든 User 관리 페이지 코드를 가져와 테스트를 해보겠다.
User 관리 페이지
1
2
3
4
5
6
7
8
9
10
11
12
13
14
15
16
17
18
19
20
21
22
23
24
25
26
27
28
29
30
31
32
33
34
35
36
37
38
39
40
41
42
43
44
45
46
47
48
49
50
51
52
53
54
55
56
57
58
59
60
61
62
63
64
65
66
67
68
69
70
71
72
@page "/user"

@using BlazorApp.Data;

<h3>Online Users</h3>

<p>
    Users: <b>@_users.Count()</b>
</p>

<br />

<ul class="list-group">
    @foreach (UserData user in _users)
    {
        <li @key="user" class="list-group-item">
            <button type="button" class="btn btn-link" @onclick="(() => KickUser(user))">[Kick]</button>
            <label>@user.Name</label>
        </li>
    }
</ul>

<br />

<div class="container">
    <div class="row">
        <div class="col">
            <input class="form-control" placeholder="Add User" @bind-value="_inputName" />
        </div>
        <div class="col">
            <!-- 속성(attribute)에도 binding할 수 있다 -->
            <button class="@_btnClass" type="button" @onclick="AddUser">Add a User</button>
        </div>
    </div>
</div>

@code {
    List<UserData> _users = new List<UserData>();

    string _inputName;
    string _btnClass = "btn btn-primary"; // 버튼 class에 binding할 변수

    protected override void OnInitialized()
    {
        _users.Add(new UserData() { Name = "define_chan" });
        _users.Add(new UserData() { Name = "Rookiss" });
        _users.Add(new UserData() { Name = "Dongglee" });
        RefreshButton();
    }

    void AddUser()
    {
        _users.Add(new UserData() { Name = _inputName });
        _inputName = "";
        RefreshButton();
    }

    void KickUser(UserData user)
    {
        _users.Remove(user);
        RefreshButton();
    }

    // 버튼 class 바꾸기
    void RefreshButton()
    {
        if (_users.Count() % 2 == 0)
            _btnClass = "btn btn-primary";
        else
            _btnClass = "btn btn-secondary";
    }
}
주석으로 표시한 부분들을 유심히 보면 된다.
@onclick과 같은 특수한 속성을 이용하지 않고 일반적인 속성에다 binding하여 지정해주고 있다. 이렇게 했을 경우 상황에 맞게 속성을 바꿔줄 수 있다.
위 코드에서는 User 수에 따라 버튼 속성을 바꿔주고 있다.
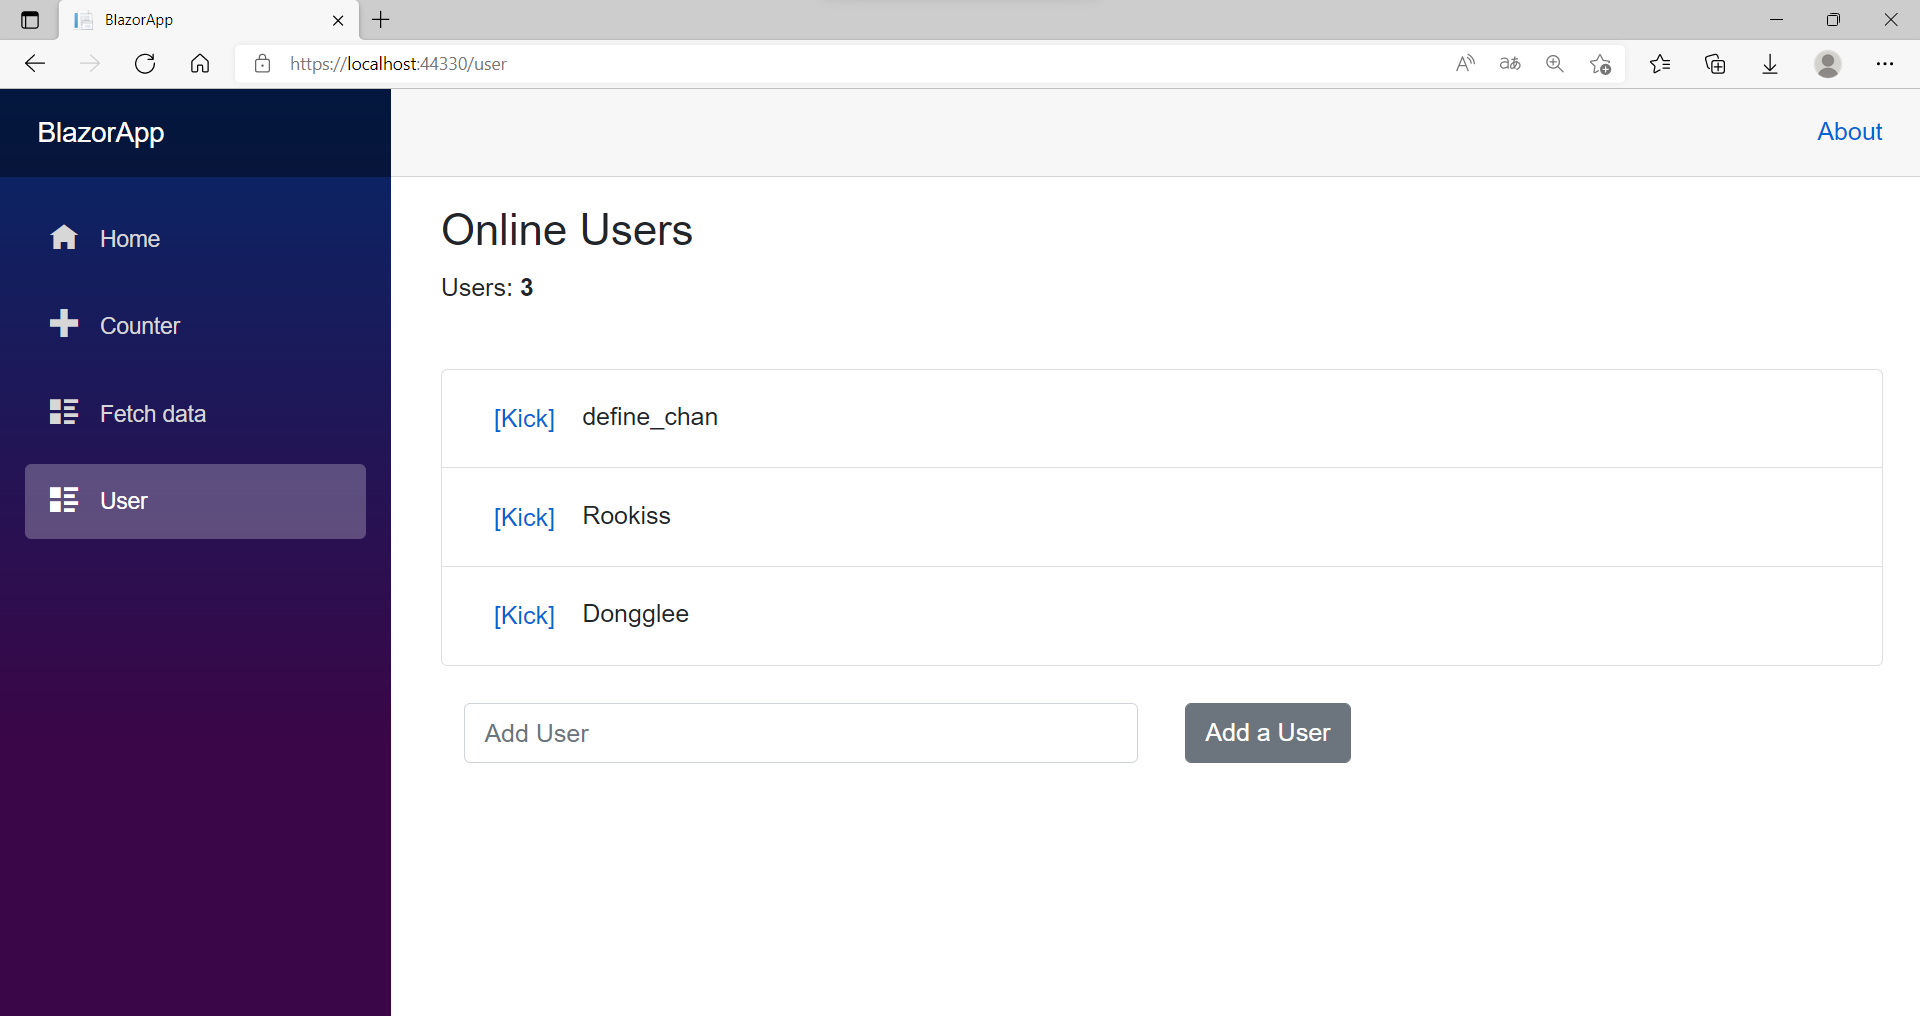
 User 수에 따라 속성이 바뀌는 버튼
속성(attribute)에 조건(conditional)을 붙일 수도 있다
아깐 속성에 변수를 바로 binding하였지만 조건을 붙여 binding할 수도 있다.
아까 코드에서 버튼에다 disabled 속성을 추가해 아래와 같이 넣어보자.
1
2
3
4
5
6
7
8
9
10
11
<div class="container">
    <div class="row">
        <div class="col">
            <input class="form-control" placeholder="Add User" @bind-value="_inputName" />
        </div>
        <div class="col">
            <!-- 속성(attribute)자체에 조건(conditional)을 붙일 수도 있다 -->
            <button class="@_btnClass" type="button" @onclick="AddUser" disabled="@(_users.Count()>=5)">Add a User</button>
        </div>
    </div>
</div>
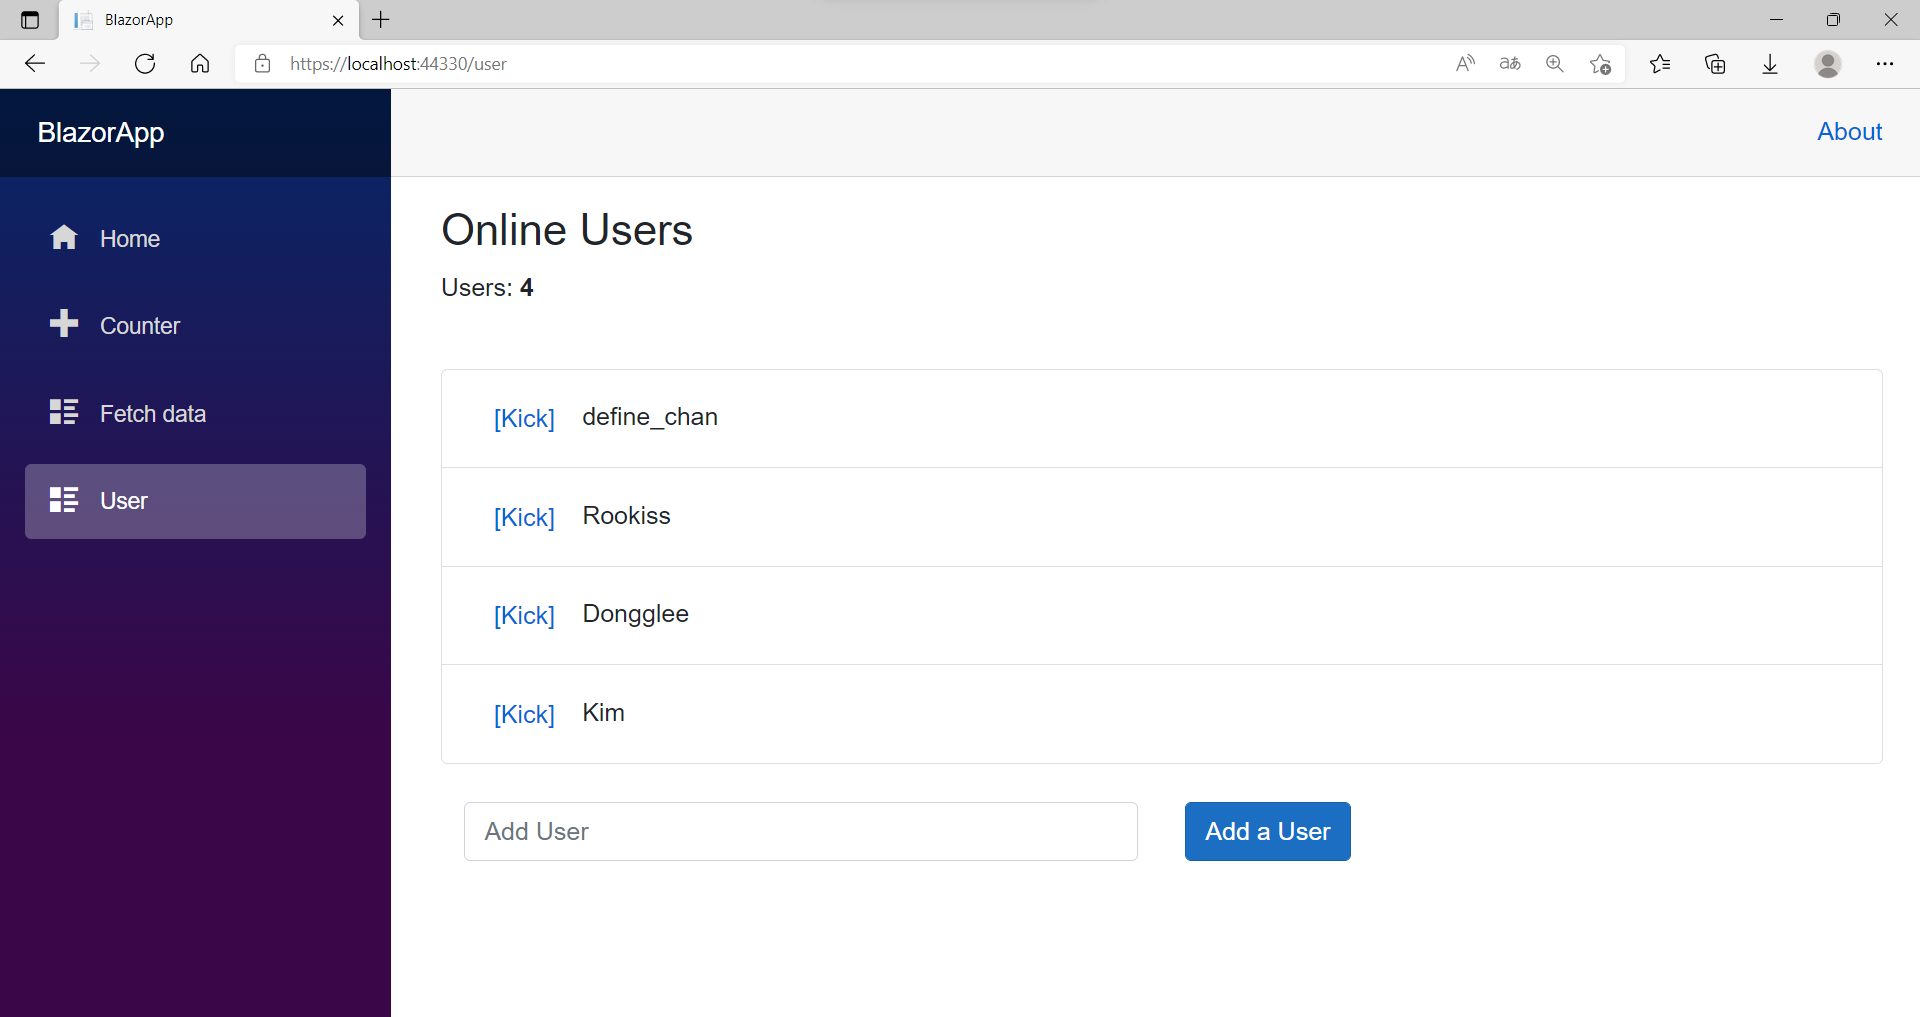
disabled 속성에 조건부 형식으로 넣고 있는 것을 볼 수 있다.
User 수가 5를 넘으면 true가 돼 버튼이 비활성화가 될 것이고,
User 수가 5 미만일 때는 false가 돼 버튼이 활성화가 될 것이다.
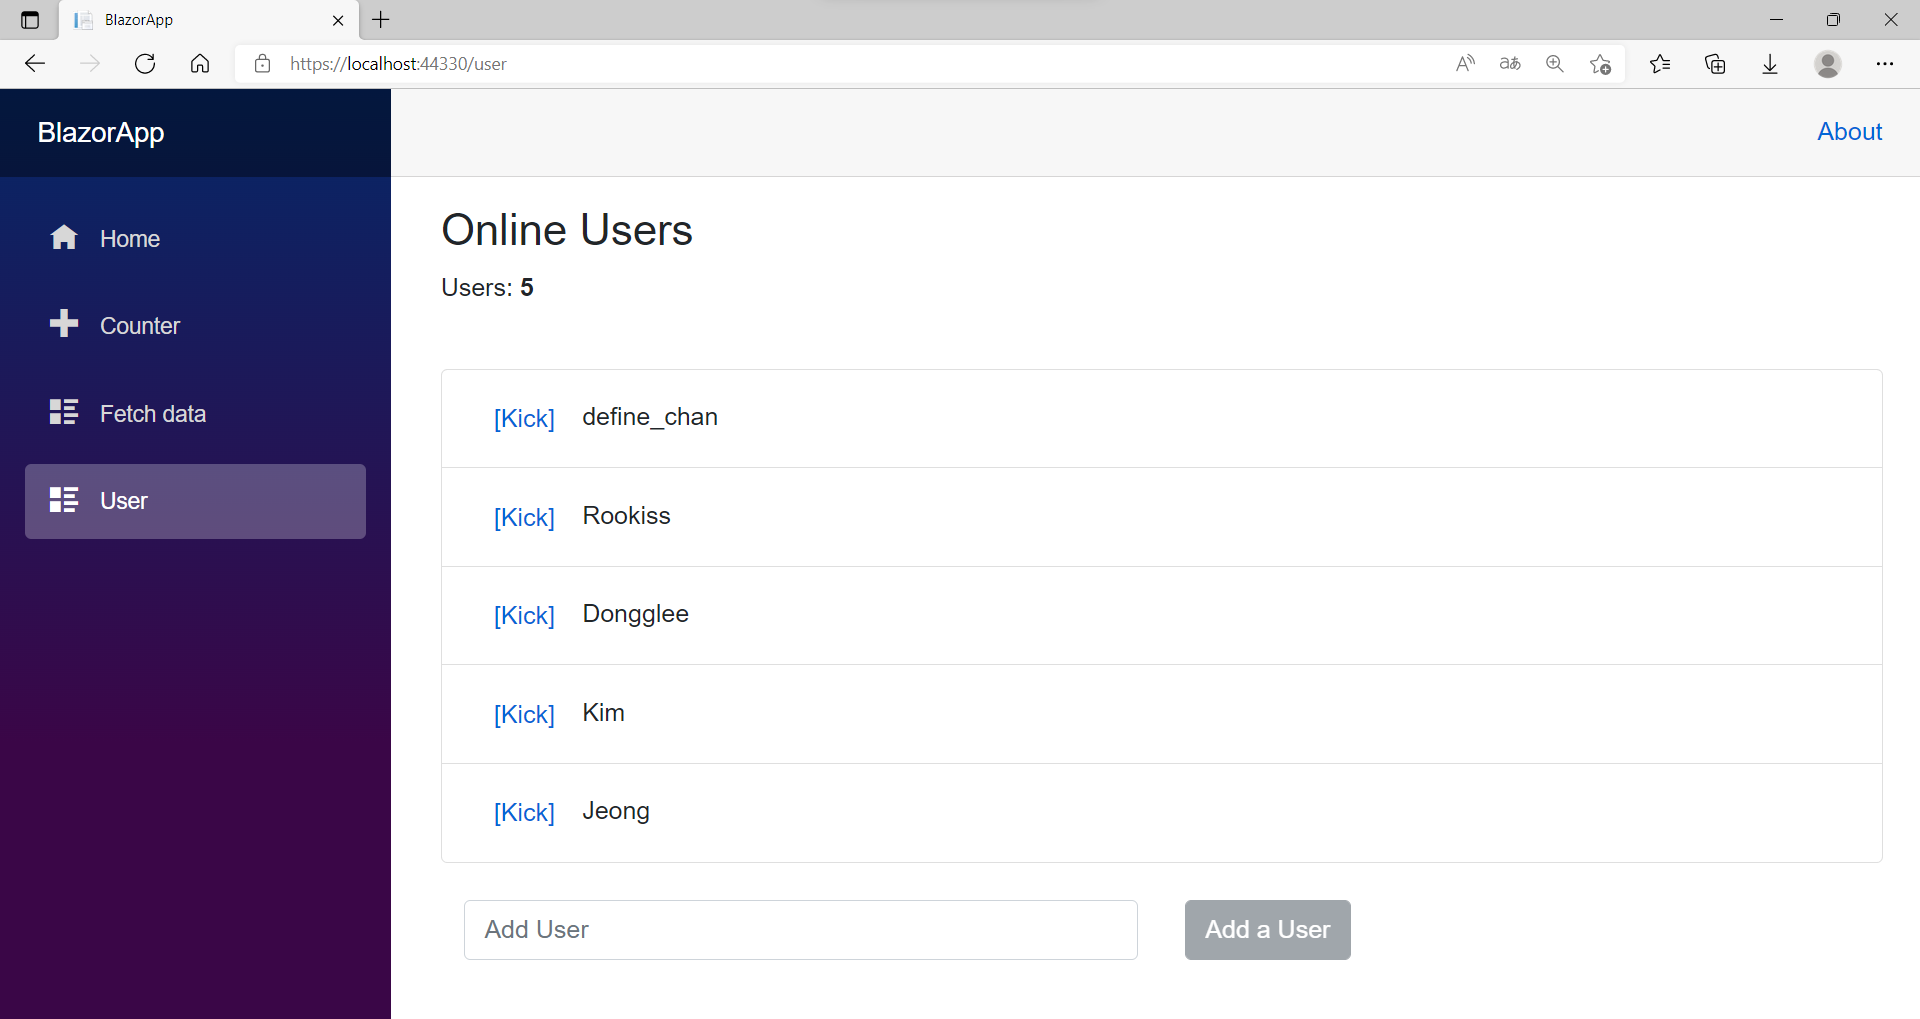 User 수가 5를 넘어 비활성화가 된 버튼
UI 수동 갱신
지금까진 데이터가 바뀌거나 수정되면 UI가 바로 갱신되는 것을 보았지만 항상 갱신된다고 할 순 없다.
간단하게 테스트를 해보자.
프로젝트를 생성할 때 기본적으로 생성되는 Counter.razor 페이지를 수정하였다.
1
2
3
4
5
6
7
8
9
10
11
12
13
14
15
16
17
18
19
20
21
22
23
24
25
26
27
28
29
30
31
32
33
@page "/counter"

<!-- Timer를 쓰기 위해 -->
@using System.Threading;

<h1>Counter</h1>

<p>Current count: @currentCount</p>

<button class="btn btn-primary" @onclick="IncrementCount">Click me</button>
<!-- Auto Increment 버튼 생성 -->
<button class="btn btn-secondary" @onclick="AutoIncrement">Auto Increment</button>

@code {
    private int currentCount = 0;

    private void IncrementCount()
    {
        currentCount++;
    }

    // 1초마다 IncrementCount()를 호출해 Count를 1씩 증가시켜준다.
    void AutoIncrement()
    {
        var timer = new Timer(x =>
        {
            InvokeAsync(() =>
            {
                IncrementCount();
            });
        }, null, 1000, 1000);
    }
}
Auto Increment 버튼을 누르면 Count가 1초마다 1씩 계속 증가하게 된다. 그러나 실행시켜서 눌러보면 화면상에 Count는 그대로 인것을 볼 수 있다.
Count가 제대로 증가하고 있는지 확인해보려면 원래 있던 Click me 버튼을 눌러보면 된다.
Click me 버튼을 눌렀을 때는 UI가 자동적으로 갱신이 되었고, Auto Increment 버튼을 눌렀을 때는 UI가 자동적으로 갱신이 되지 않았다.
이유는 복잡하지만 일단 이 문제를 해결하는 방법은 수동으로 UI를 갱신시켜주면 된다.
1
2
3
4
5
6
7
8
9
10
11
12
13
14
15
16
17
18
19
20
21
22
@code {
    private int currentCount = 0;

    private void IncrementCount()
    {
        currentCount++;
    }

    // 1초마다 IncrementCount()를 호출해 Count를 1씩 증가시켜준다.
    void AutoIncrement()
    {
        var timer = new Timer(x =>
        {
            InvokeAsync(() =>
            {
                IncrementCount();
                StateHasChanged(); // 수동으로 UI 갱신
            });
        }, null, 1000, 1000);
    }
}
StateHasChanged()를 호출하면 component에 상태가 변경 되었음을 알리고, 그로 인해 component가 다시 렌더링된다.
StateHasChanged()는 따로 구현해주어야 하는 것이 아니고 ASP.NET Core에서 제공되는 함수이다.
StateHasChanged()를 추가하고 실행시켜보면 UI가 잘 갱신되는 것을 볼 수 있다.